
Last updated: November 12, 2026
Key Takeaways
- Use the right setup for the surface: wall mount, ceiling bracket, screw anchor, and beam check before fastening.
- For drywall, a screw anchor plus wall mount is more secure than a bare screw in soft board.
- For overhead work, use a ceiling bracket or overhead mount rated to stay fixed above you.
- Magnetic mounts suit steel; adhesive mounts suit light, temporary use on clean, smooth surfaces.
Mount your laser level with the right wall mount or ceiling bracket, and keep it stable, level, and aimed where the job needs it. The best setup depends on the surface: screw anchor for drywall, magnet for steel, and adhesive only for light-duty temporary use. The steps below show where each mount works, what to avoid, and how to get the beam where you want it. How to mount a laser level on a wall or ceiling starts with the surface and the mount.
What you need before the laser level goes on the wall

You need a laser level, a wall mount, a ceiling bracket, a screw anchor, and a way to check the beam line before you fasten anything. The wrong mount wastes time fast, especially overhead where a loose bracket can drop a tool onto finished surfaces. For common threaded bases, many laser tools use a 1/4-20 thread.
Picture this: you’re standing on a ladder, holding a laser level in one hand and a bracket in the other, trying to guess if the beam will land on the mark. The answer is to sort the surface first, then pick the mount that fits it.
- Drywall or plasterboard: use a screw-fastened wall mount with a proper anchor.
- Steel beam or metal track: use a magnetic mount.
- Ceiling grid or overhead framing: use a ceiling bracket made for that span.
- Smooth tile or painted surface: use adhesive only for light, temporary work.
The truth is, most mounting problems come from skipping the surface check. A wall mount on drywall needs holding power; an adhesive pad on a dusty ceiling does not. If the laser sits in a case with a 1/4-20 thread, that thread should line up with the mount before you start.
How do you mount a laser level on drywall?
You mount a laser level on drywall with a screw anchor and a wall mount, not with a bare screw in soft board. Drywall gives way under pull, so the anchor carries the load and keeps the bracket from creeping.
Picture this: you’ve marked the height on the wall, and the beam needs to stay fixed while you work across a room. You want a mount that stays put for the full run, not one that loosens after a few bumps.
- Mark the mount point with a pencil at the height you want.
- Hold the wall mount against the mark and check the beam path.
- Drill a pilot hole sized for the screw anchor.
- Insert the anchor flush with the drywall face.
- Fasten the mount with the screw until it sits tight and flat.
- Attach the laser level to the mount and aim the beam.
A snug mount should not rock when you touch it. If the bracket twists while you tighten the screw, the anchor is either too loose for the hole or the wall is crumbly behind the paper face.
- Use a toggle anchor or other drywall anchor when the tool needs more hold than a simple plastic plug can give.
- Keep the mount clear of outlets, pipes, and hidden wiring.
- If the laser has a magnetic base, still give the wall a mechanical fastener when the job runs longer than a quick mark.
Here’s the catch: drywall is forgiving until it isn’t. A small error in hole size can turn a solid mount into a wobble, and wobble shows up as a wandering line.
How do you mount a laser level on a ceiling?
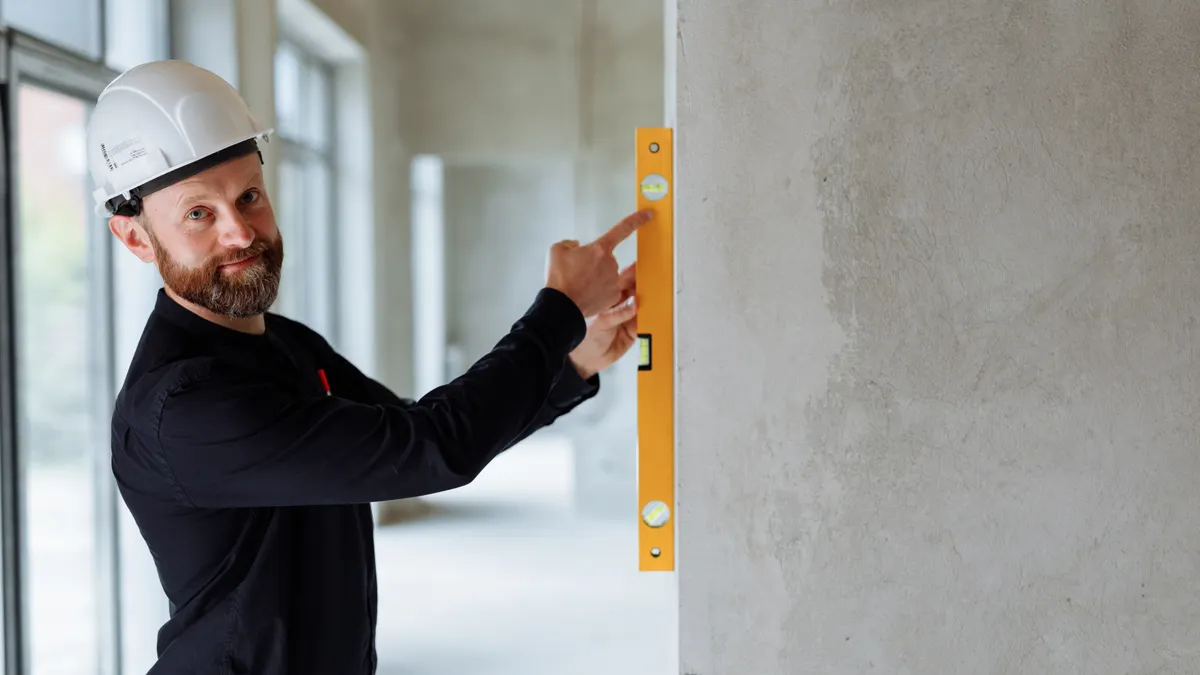
You mount a laser level on a ceiling with a ceiling bracket or an overhead mount that is rated to stay fixed above you. Overhead work can need a firmer hold than sidewall work because gravity keeps pulling the setup away from the surface.
Picture this: you’re lining up cabinet runs, duct work, or a dropped ceiling, and the beam has to project from above without drifting. A ceiling bracket solves that by giving the laser a fixed point instead of a hand-held guess.
- Locate the framing member, joist, or ceiling grid point you can fasten to.
- Position the ceiling bracket so the laser points where the line should fall.
- Fasten the bracket with the proper screw or anchor for the ceiling material.
- Lock the laser level into the bracket.
- Adjust the head until the beam lands on the target marks.
- Tighten every joint so vibration or movement will not shift the line.
A ceiling bracket is often the better choice when the beam needs to stay overhead for a long stretch. Adhesive pads can let go in heat, dust, or vibration, and that risk goes up when the laser hangs upside down or at an angle.
- Choose a bracket with a firm clamp or cradle, not a loose tray.
- Use the shortest mounting arm that still clears nearby trim or fixtures.
- Keep the cord, if there is one, out of the walking path.
On the other hand, not every ceiling is a good mount point. Drop ceilings and weak finish boards may need a different support than solid framing. If the surface flexes when pressed, it is not the right place for a hanging laser.
Magnetic mounts, adhesive mounts, and when each one makes sense
Magnetic mounts work best on steel, while adhesive mounts work only for light, temporary placement on clean, smooth surfaces. That split matters because each mount fails in a different way.
Picture this: you’re on a steel track one day and a painted wall the next. The first job can take a magnet in seconds; the second may need a screw anchor or a bracket to stay honest.
- Magnetic mount: best on steel studs, beams, machine frames, and other ferrous metal.
- Adhesive mount: best for short-term alignment on smooth, dry, clean surfaces.
- Screw-fastened mount: best when the laser must stay in place for the full job.
- Ceiling bracket: best when the beam must project from overhead.
A magnet gives quick placement and easy repositioning. The downside is just as clear: if the metal is thin, painted, curved, or dirty, the grip drops fast. A magnet also does nothing on wood, drywall, or tile.
Adhesive mounts are even more limited. Heat, humidity, and old paint can weaken the bond. That makes them a bad fit for a ceiling install, and a poor choice anywhere the tool might get bumped.
- Clean the surface with a dry cloth before using any adhesive pad.
- Do not trust adhesive on dusty drywall, popcorn texture, or rough plaster.
- Use a magnet only on metal you know will hold the tool’s weight and angle.
How to position the beam so the mount actually helps
You position the beam by aiming the laser first, then tightening the mount after the line sits where the work needs it. If you fasten the bracket before checking the beam, you may lock in a bad angle and have to start over.
Picture this: the mount is on the wall, but the beam lands 2 inches off your mark and runs across a door casing. You do not need a new laser; you need a better position and a small adjustment.
- Place the laser level loosely in the mount.
- Project the beam onto the target line or reference point.
- Shift the mount left, right, up, or down until the beam matches the layout.
- Tighten the mount without moving the body of the laser.
- Recheck the line after tightening, because some mounts drift a little.
A good setup keeps the line visible across the working area with no bracket shadow in the way. If the beam crosses a corner or doorway, make sure the mount does not block the path or force the laser into a strange tilt.
A 1/4-20 threaded base, common on many laser tools, helps here because it gives repeatable attachment. If your model uses a clip or cradle instead, make sure the locking point cannot slip when you turn the head.
Safety and stability checks before you walk away
You check for lockup, fall risk, and beam clearance before leaving a mounted laser level alone. That takes less than a minute and saves a repair if the mount shifts or drops.
Picture this: the line looks perfect for the first few minutes, then the bracket slowly sags while you’re across the room. That kind of drift is hard to notice until a shelf or tile course is already wrong.
- Tug the mount lightly to confirm it does not move.
- Check that screws are seated and anchors are fully set.
- Look for loose hardware that could snag.
- Keep the beam clear of reflective glass that can make the line hard to read.
A ceiling bracket anchored into solid framing is better than a sticky pad on paint, and a screw-fastened wall mount is better than a magnet on questionable metal. For overhead mounting guidance, see OSHA’s fall-protection resources and the manufacturer instructions for your laser level.
If the mount feels uncertain, stop and reset it. A laser level is a layout tool, not a load-bearing device, and a shaky setup will make every mark behind it suspect.
How I choose the right mount for the job
I choose the mount by surface, hold time, and direction of the beam. That simple rule keeps the setup from getting overcomplicated.
Picture this: you have one wall to mark today and a ceiling grid tomorrow. The right mount changes with the job, but the decision never should. A wall mount for drywall, a magnetic mount for steel, and a ceiling bracket for overhead work cover most cases.
- Drywall or plaster: screw anchor plus wall mount.
- Steel surface: magnet.
- Temporary smooth surface: adhesive, only for light use.
- Overhead layout: ceiling bracket with a firm fastener.
The biggest mistake is treating all surfaces the same. They are not the same, and the mount that works on metal can fail on drywall in a single bump. If the surface is uncertain, consult the manufacturer instructions or a qualified professional before you drill or fasten.
For a bigger picture of layout tools and accessories, the hub page at laserlevelsfordiy.com the complete guide is the right place to start before choosing a full setup.
Can you mount a laser level on drywall?
Yes, you can mount a laser level on drywall with the right anchor and wall mount. Use a screw anchor that matches the board thickness and the mount weight, then fasten the bracket so it sits flat. A bare screw in drywall is a poor choice because it can loosen and pull out.
What is the safest way to mount a laser level overhead?
The safest overhead setup is a ceiling bracket fastened into solid framing or another surface rated to hold the tool. A loose adhesive pad is not the safe choice for overhead work. Tighten every joint, then check that the beam stays fixed before you leave it.
Do laser levels come with wall mounts?
Some laser levels come with a wall mount, but many do not. The package can include a clip, bracket, or magnetic base, or it may leave the mount to be bought separately. Check the box and the model listing before you assume the mount is included.
Drafted with AI; not yet reviewed by a person.